Chapter 4. Commands on the Filter menu
This chapter describes the options that are available on the Filter menu:
When you have finished reading this chapter you will know how to:
Set a buffer filter to select a subset of the buffers in the event file.
Create a search pattern to locate text, regular expressions or bit patterns within data buffers that have already been read and formatted by bufdump.
Repeat a previous search of the established search pattern.
If some of the concepts and terminology described above are unfamiliar or unclear to you, please (re)read: Chapter 2: Introduction to bufdump concepts where these concepts are described.
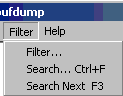
4.1. ->
The -> menu command allows you to establish a filter on the buffers that are processed by bufdump. Filters allow you to specify which buffers are interesting to you. bufdump will skip buffers that do not make the filter criterion you establish via this command.
Since there is never an end of data source on an online data source, exercise care in establishing filters on these sources. If you read the next buffer while a filter is established that can never be matched, bufdump will hang forever ignoring buffers until you abort it.
When you click on ->, the filter creation dialog will pop up. This dialog is shown below:
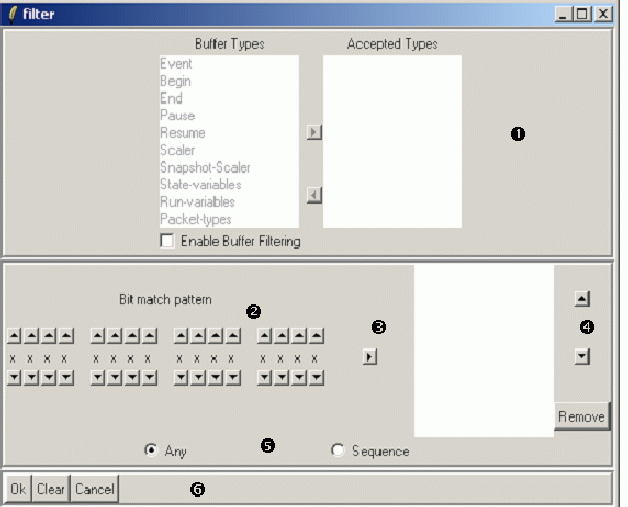
In the discussion that follows, the numbers refer to the circled numbers on the screenshot.
Checking the checkbox enables a selection of the subset of buffer types. This selection is applied prior to any bit pattern matching on the contents of a buffer. When this checkbox is checked, the remainder of this frame is enabled. Select the desired buffer types in the Buffer Types listbox and click on the right arrow button to move the selected buffer types to the Accepted Types list. If you no longer wish to accept buffers of a specific type, select that type in the Accepted Types listbox and click the left arrow button to move that buffer type back to the Buffer Types listbox.
This section of the dialog allows you to visually edit a bit patttern. Each x below represents a bit. Using the up arrow buttons above and the down arrow buttons below each bit you can toggle each bit between the states:
- 1
Means a match requires a 1 in this bit position
- 0
Means a match requires a 0 in this bit position
- x
Means that any bit value will match in this position.
Once you have finshed createing a bit pattern add it to the pattern list list box on the right by clicking the right arrow button.
You may alter the order of the bit patterns in this listbox by selecting a pattern and clicking the up or down arrow buttons to move it up or down within the list. If you wish to remove a pattern from the list select it and click the button.
Bit pattern matches can be either a Match any criterion where a buffer is accepted if the body of the buffer has a bit pattern that matches any of the bit patterns in the right listbox, or Match Sequence where a match occurs only if a sequence of words matches all of the bit patterns in the ordered sequence of bit patterns in the right listbox. Use these radio buttons to select which type of match you want.
This strip of the dialog has three buttons:
Accepts the filter and dismisses the dialog. Note that the filter is applied the next time you ask bufdump to get a buffer from the data source. Data buffers already accepted and formatted remain displayed.
Clears the filter. A cleared filter accepts all buffers.
Dismisses the dialog without making any changes to the current filter.