Analyzing DDAS Data in SpecTcl
Table of Contents
- Date
- 5/17/24 - Initial guide for FRIBDAQ 12.0.
- 11/10/25 - ASC: updated for SpecTcl using DDASFormat 1.1+ and UnifiedFormat 2.2+, decoding DDASToys fit info in SpecTcl
- 8/6/26 - ASC: updated for SpecTcl 7.1.
Introduction
- FRIBDAQ supports a wide variety of data acquisition hardware which use different data formats. Even for a single piece of DAQ hardware, data payloads may vary experiment to experiment based on which features of the digitizers are used. For example the Pixie data payload structure depends on whether trace data, QDC sums, etc. are enabled. For this reason, there is no pre-compiled version of SpecTcl provided to deal with DDAS data. Rather there are two unpackers that are provided by SpecTcl,
DAQ::DDAS::DDASUnpackerandDAQ::DDAS::DDASBuiltUnpacker. The difference between the two is that the latter unpacks data that has been built with the FRIBDAQ event builder. For trace data with fit info appeneded to the data using the DDASToys processing pipeline, theDAQ::DDAS::DDASBuiltFitUnpackerand its associated library can be used if the SpecTcl version was installed with DDASToys support.
- In most applications you will be looking at event-built data without fit extensions. The unpackers provide a consistent interface for interacting with the DDAS data. In this tutorial, you will learn how to incorporate an unpacker and some simple custom code into your SpecTcl application. We will assume event-built data for the remainder of this tutorial.
- Note
- If you are not working with event-built data, use the
DAQ::DDAS::DDASUnpackerrather thanDAQ::DDAS::DDASBuiltUnpacker. Everything else should remain the same.
- The source code for the example discussed in this tutorial can be found at
PREFIX/VERSION/DDASSkel/wherePREFIXis the installation prefix path andVERSIONis some SpecTcl version 7.1 or later. On FRIB computer systems thePREFIXpath is most likely/usr/opt/spectcl. The user does not have deal with the low-level raw data when building a SpecTcl. Rather, they just need to implement a class that uses the unpacked DDAS data to set tree parameters for histogramming. In this way, the user is isolated from the details of the DDAS data structure. In any case, let's get down to business constructing a tailored SpecTcl.
- Note
- You should never need to write your own DDAS event parser. We provide tools for this purpose.
Creating a Tailored SpecTcl
- We will start the tailored SpecTcl tutorial by copying the DDAS SpecTcl skeleton code to some local working directory. Something like:
cp -r /usr/opt/spectcl/7.1-000/DDASSkel/ mySpecTcl
cd mySpecTcl
- You can make and run this example code right away. But, in the interest of learning, we will take a step back and try to understand what the DDAS SpecTcl skeleton is doing and how it is structured. We'll start with the raw data processing stage which utilizes the unpacker we mentioned in Introduction.
Using the DDAS Unpacker
- The provided unpackers understand how to navigate the fragments of DDAS data and unpack the event fragments into "hits." Each hit is represented by a
ddasfmt::DDASHitobject. In addition to time and energy, and potentially traces or other data, this object identifies the channel the hit comes from by its crate, slot, and channel ID. Using the unpacker is a matter of defining the set of parameters you want your system to produce. Each channel minimally produces a timestamp and an energy. Users then provide the software to map the data in the vector ofddasfmt::DDASHits extracted from the event into specific SpecTcl parameters. We'll take a closer look at this when we discuss the parameter mapper.
Constructing the Parameter Tree
- The first thing to do is decide how to structure the SpecTcl parameters. Note that how you structure your parameters may be very different than this example. Ideally your parameters should be structured in a way that reflects the organization of detector parameters.
- SpecTcl's tree parameters are used to store our event data. Refer to the SpecTcl documentation for more information. What we need to know for now is that a tree parameter wraps a SpecTcl raw parameter. Tree parameters also provide metadata that guide the user in creating spectra that are defined on those parameters.
- In this simple example, we are going to concern ourselves with the energy and timestamp values for each channel as well as the multiplicity (the number of fragments in a built event). In our example, we limit our setup to a single, 16-channel module. If you expand on this example you will likely need to allocate more parameters.
- The tree structure of the data is defined in the MyParameters class discussed earlier. The code in the header file
MyParameters.his:
#ifndef MYPARAMETERS_H
#define MYPARAMETERS_H
#include <string>
#include <TreeParameter.h>
#include <config.h>
struct MyParameters {
CTreeParameter s_multiplicity;
CTreeParameterArray s_energy;
CTreeParameterArray s_timestamp;
MyParameters(std::string name);
};
#endif
- The implementation in
MyParameters.cppis fairly simple:
#include "MyParameters.h"
MyParameters::MyParameters(std::string name) {
s_multiplicity.Initialize(name + ".mult", 32, 0, 31, "a.u.");
s_energy.Initialize(name + ".energy", 32768, 0, 65535, "a.u.", 16, 0);
s_timestamp.Initialize(name + ".timestamp", 64, 0, std::pow(2, 64) - 1, "ns",
true, 16, 0);
}
- Note that the
CTreeParameter::Initialize()method provides the parameter name and other metadata associated with the parameter. There are several overloads to construct and initializeCTreeParametersandCTreeParameterArrayswhich can be found in the SpecTcl programming reference. Note that in the DDAS readout code, all timestamps are converted to nanoseconds regardless of the digitizer speed. This makes the job of the event builder easy and also allows you to easily compare timestamps in heterogeneous systems.
Constructing a ParameterMapper
- The
DAQ::DDAS::DDASBuiltUnpackeriterates over the fragments in events output by the event builder. The hits from each fragment are decoded intoddasfmt::DDASHitobjects. The next step is to determine what to do with the vector ofddasfmt::DDASHitobjects decoded from each event. Lets take a closer look at theMyParameterMapperclass source code where we set our raw parameters. The header file looks like:
#ifndef MYPARAMETERMAPPER_H
#define MYPARAMETERMAPPER_H
#include <ParameterMapper.h>
#include <map>
#include <utility>
class CEvent; // SpecTcl event, we don't use it.
class MyParameters; // The strucutre of tree parameters.
struct ModuleInfo {
int s_crateId;
int s_slotId;
int s_nChannels;
return std::make_pair(s_crateId, s_slotId) <
std::make_pair(other.s_crateId, other.s_slotId);
}
};
class MyParameterMapper : public DAQ::DDAS::CParameterMapper {
private:
MyParameters &m_params;
std::map<std::pair<int, int>, int> m_chanMap;
public:
MyParameterMapper(MyParameters ¶ms);
virtual void mapToParameters(const std::vector<ddasfmt::DDASHit> &channelData,
CEvent &rEvent);
private:
void buildChannelMap(std::vector<ModuleInfo> &modules);
int computeGlobalIndex(const ddasfmt::DDASHit &hit);
};
#endif
bool operator<(const DDASReadout::RawChannel &c1, const DDASReadout::RawChannel &c2)
operator<
Definition: RawChannel.cpp:291
- The
ModuleInfostruct is used to define a global channel map for systems of mixed 16- and 32-channel modules. We will discuss this in more detail later. You are, of course, free to implement your own mapping scheme, this is simply one of many vaild approaches.
- The
MyParameterMapperclass maintains a reference to our parameters and anm_chanMapdata member, which we will talk about a little later. This class is derived from theDAQ::DDAS::CParameterMapperbase class. ConcreteDAQ::DDAS::CParameterMapperclasses are expected to provide amapToParameters()method that takes the hits and fills the parameters.
- In our case: We fill tree parameters so we don't need to refer directly to the
rEventparameter. We add a methodcomputeGlobalIndex()and an associated helper functionbuildChannelMap()to which computes the index into theCTreeParameterArrayobjects. Remember that the the parameter arrays store the energy and timestamp for each channel in the system. This method does no range checking. If you use this example in your system, be sure that you've built your arrays big enough.
- So what does the
mapToParameters()method do? Let's consider what is passed into the method as arguments. The most important of these is the first, which is a vector ofddasfmt::DDASHitobjects. Addasfmt::DDASHitobject encapsulates the data contained in a single channel hit. It contains things like the crate/slot/channel identifying information, energy, timestamp, trace data, as well as QDC and energy sum or baseline data, if enabled. It is essentially just a way to access data elements at a higher level. The provided unpacker will parse the raw data and fill theddasfmt::DDASHitvector with all of the data in each event. If more than one hit was in an event, there will be more than oneddasfmt::DDASHitobject in the vector.
- Here is the implementation of the
mapToParameters()method from the skeleton (for the full code seeMyParameterMapper.cpp):
void MyParameterMapper::mapToParameters(const std::vector<DDASHit> &channelData,
CEvent &rEvent) {
size_t nHits = channelData.size();
// Assign number of hits as event multiplicity:
m_params.s_multiplicity = nHits;
// Loop over all hits in event:
for (size_t i = 0; i < nHits; i++) {
// Convenience variable declared to refer to the i^th hit:
auto &hit = channelData[i];
// Use the crate, slot, and channel to figure out the global index:
int idx = computeGlobalIndex(hit);
// Assign values to appropriate channel:
m_params.s_energy[idx] = hit.getEnergy();
m_params.s_timestamp[idx] = hit.getTime();
}
}
- Let's think a little about the
computeGlobalIndex()method. The responsibility of this method in this example is to map the hit to a global channel index in the range [0, 15] using the crate, slot, and channel information from theddasfmt::DDASHitobject encapsulating a single hit. To do this, we need to input some information concerning the layout of the modules in the crates. Them_chanMapvariable stores the information about how many channels each module contains.
MyParameterMapper::MyParameterMapper(MyParameters ¶ms) : m_params(params) {
std::vector<ModuleInfo> modules = {
{0, 2, 16}, // Crate 0, slot 2, 16 channels
// Add more modules here if needed
};
buildChannelMap(modules);
}
- Note
- To add additional cards: std::vector<ModuleInfo> modules = {{0, 2, 16}, // Crate 0, slot 2, 16 channels{0, 3, 16}, // Crate 0, slot 3, 16 channels{0, 4, 32}, // Crate 0, slot 4, 32 channels};
- The channel map
m_chanMapis used to compute the global channel index in themapToChannels()method in the following way:
int MyParameterMapper::computeGlobalIndex(const DDASHit &hit) {
int crateId = hit.getCrateID();
int slotIdx = hit.getSlotID();
int chanIdx = hit.getChannelID();
auto key = std::make_pair(crateId, slotIdx);
return m_chanMap.at(key) + chanIdx;
}
- Note
- the function
std::map::atwill throw astd::out_of_rangeexception if either the key or the element the key refers to do not exist. This will most likely cause your SpecTcl instance to immidiately crash with a traceback message informing you of this fact. This is intentional, as a malformed channel map for the raw parameters will break all downstream data processing.
Adding Custom Code: SpecTcl Event Processors
- It is most likely the case that your application requires additional functionality beyond simply unpacking raw data into raw channel parameters. In this section we will discuss how to create a simple calibrator class as a SpecTcl event processor with its own set of tree parameters.
- As before, we'll take a look at the source code starting with the definition of our calibrator in
MyCalibrator.h:
#ifndef MYCALIBRATOR_H
#define MYCALIBRATOR_H
#include <EventProcessor.h>
#include <TreeParameter.h>
class MyParameters;
class MyCalibrator : public CEventProcessor {
private:
MyParameters &m_params;
CTreeParameterArray m_ecal;
CTreeVariableArray m_slope;
CTreeVariableArray m_offset;
public:
MyCalibrator(MyParameters &rParams);
Bool_t operator()(const Address_t pEvent, CEvent &rEvent,
CAnalyzer &rAnalyzer, CBufferDecoder &rDecoder);
};
- The first thing to note is that this class is derived from
CEventProcessor. If you want to add event processors to your SpecTcl analysis pipeline, they should also be derived fromCEventProcessorand override the appropriate methods of the base class to incorporate your code. Again, the class itself is relatively straightforward: In addition to the raw parameters, it hasCTreeVariableArraymembers to store the energy calibration slopes and offsets and aCTreeParameterArraymember to store the calibrated energies. We pass the raw parameters to theMyCalibratorclass on construction and override the base classoperator()with our code.
- Note
- For more complex applications, it may be useful to refactor your parameters, variables, and event processors into different files to avoid clutter. Clean code is much easier to maintain and debug.
- The implementation of this class in
MyCalibrator.cppis similarly straightforward:
#include "MyCalibrator.h"
#include <random>
#include "MyParameters.h"
#include <config.h>
MyCalibrator::MyCalibrator(MyParameters &rParams)
: m_params(rParams), m_ecal("cal", 32768, 0, 32767, "a.u", 16, 0),
m_slope("slope", 0.5, "", 16, 0), m_offset("offset", 1000., "", 16, 0) {}
Bool_t MyCalibrator::operator()(Address_t pEvent, CEvent &rEvent,
CAnalyzer &rAnalyzer,
CBufferDecoder &rDecoder) {
static std::random_device rd;
static std::mt19937 gen(rd());
static std::uniform_real_distribution<> dist(0., 1.);
for (int i = 0; i < 16; i++) {
if (m_params.s_energy[i].isValid()) {
m_ecal[i] = m_slope[i] * m_params.s_energy[i] + m_offset[i] + dist(gen);
}
}
return kfTRUE;
}
- The constructor initializes
m_paramswith a reference to theMyParametersstruct which has its data set during the unpacking stage. The calibrated energy parameters and variables are initialized with some default values. InMyCalibrator::operator(), the calibrated energy is computed from the raw energy parameter for the channels present in the event. The addition of a random number in [0, 1) is often done to ensure that the calibrated data is binned correctly when constructing a histogram.
- Note
- A common mistake for authors of event processors is to forget to return a value. This can result in randomly and silently dropping events as return value will be not well defined.
Integrating Code into MySpecTclApp
- Now we can take a look at how to incorporate these event processors into a SpecTcl analysis pipeline. We won't concern ourselves too much with most of the methods in the
CMySpecTclAppclass. We'll look instead at the implementation of theCMySpecTclApp::CreateAnalysisPipeline()function inMySpecTclApp.cpp:
#include "MySpecTclApp.h"
#include <config.h>
#include "DDASBuiltUnpacker.h"
#include "MyParameterMapper.h"
#include "MyParameters.h"
#include "MyCalibrator.h"
using namespace DAQ::DDAS;
//________________________________________________________________________
// Create the parameter tree
//
MyParameters params("raw");
//________________________________________________________________________
// Create a MyParameterMapper and pass it to the unpacker. The unpacker
// will take ownership of this object. The mapper maintains a reference
// to the raw parameters but does not own them.
//
static CDDASBuiltUnpacker unpacker({0}, *(new MyParameterMapper(params)));
//________________________________________________________________________
// Create event processors implementing our custom code. The calibrator
// maintains a reference to the raw parameters but does not own them.
//
static MyCalibrator calibrator(params);
//________________________________________________________________________
void
CMySpecTclApp::CreateAnalysisPipeline(CAnalyzer& rAnalyzer)
{
RegisterEventProcessor(unpacker, "Raw");
RegisterEventProcessor(calibrator, "Cal");
}
- There are a few things to discuss here. The first is that this source file must include the headers which define the parameter structure and event processors that you use in your application (the
Makefilemust also have a rule to build and link the object files associated with these classes, see the comments in theMakefilefor details). Finally, we instantiate the parameters and event processors we'll use in the global scope, with the event processors declared using the static keyword. Finally, we create the analysis pipeline by registering the two event processors described in the previous sections.
- Event processors run in the order which they are registered. Both event processors maintain a reference to the same
MyParametersobject. The unpacker stage sets the values of the raw parameters which are used by the calibration stage to derive and set values for the calibrated parameters. In this way the output of one event processing stage can be passed along to the next stage.
- Note
- Writing minimal event processors with well-defined behavior will make your code easier to understand and debug.
Running SpecTcl
Building SpecTcl
- To build the skeleton code, run the
makecommand. The Makefile has the minimal set of compiler and linker flags needed to build and run this application. If you need to incorporate other external libraries you will need to modify theUSERCXXFLAGSandUSERLDFLAGSMakefile variables. Additional code can be automatically compiled and built into the final application by appending it to the end of theOBJECTSvariable. Once the program has been built, execute the command./SpecTclto run it.
Creating Spectra
- The simplest way to create spectra is to run your tailored SpecTcl application and use the treegui to create spectra for your parameters. To create a spectrum use the Parameter pull-down menu on the left side of the treegui. Clicking on the menu will open a list of parameters which you can use to construct spectra.
- Select
raw->energy->00from the list and give the spectrum a name. I chose:raw.energy.00. - Click the Create/Replace button. The created spectrum will be added to the list.
- Select
- You can also quickly create many spectra from array parameters. Again, start by clicking the Parameter pull-down menu.
- Click the Array checkbox beneath the Create/Replace button to tell the GUI we are creating an array of spectra.
- Select
cal->00. - Type "cal" (without the quotes!) in the SpectrumName box to set the base name of the spectra.
- Click the Create/Replace button. The created spectra will again populate the spectrum list. This time you should see spectra cal.00, cal.01, ..., cal.15: one for each element in the parameter array.
- To save your spectra, click the Save button in Definition file box on the right side of the treegui. Choose a name for your spectrum file and click Save. You can load the spectra from this file using the Load dialog in the same box.
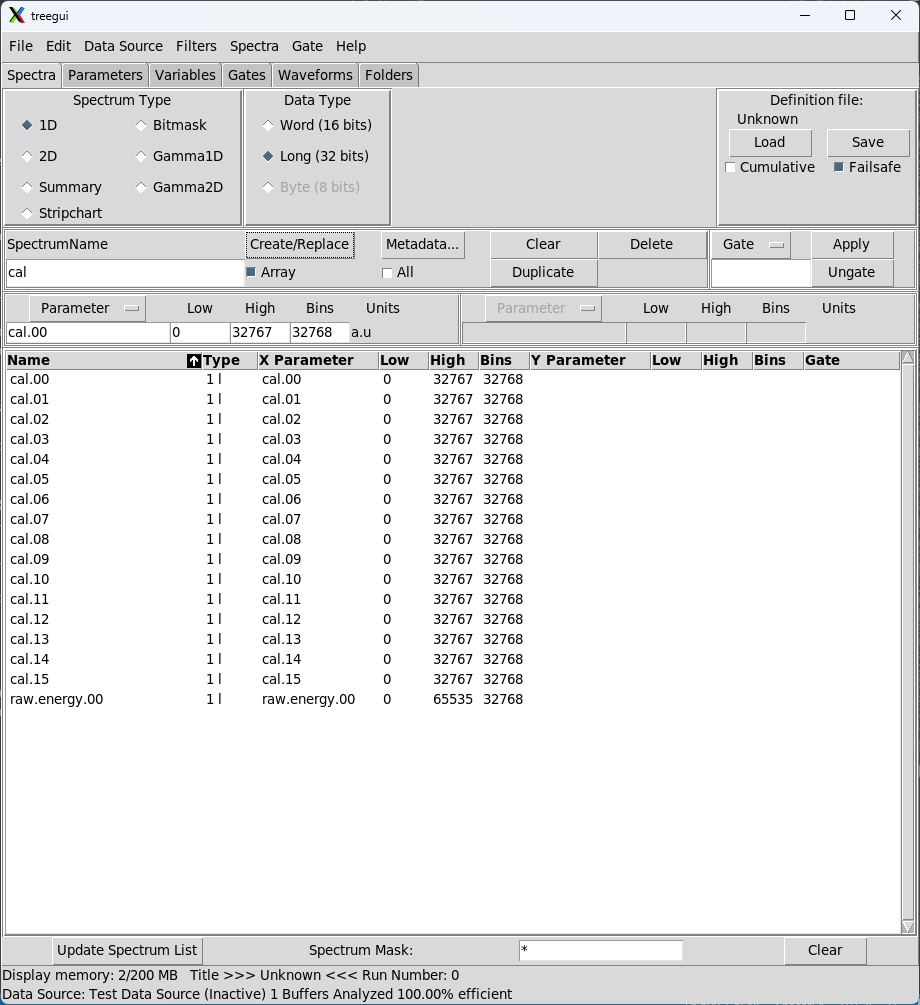
The SpecTcl treegui window after creating some example spectra.
Displaying Spectra in the CutiePie GUI
- You can view created spectra using the CutiePie GUI. CutiePie is a PyQt-based replacement for the venerable Xamine-based viewer many readers will be familiar with. We cover only some basics here. For a more complete discussion of the CutiePie GUI and its capabilities, refer to the CutiePie documentation.
- On older versions of CutiePie, you need to click the Connect button to connect CutiePie to your SpecTcl application.
- The Server field should contain the name of the system on which your SpecTcl application is running.
- The User should be you (or whatever account you are using).
- The REST and Mirror port can be left at default values.
- Click OK. The Connect button should change color from blue to green and read Connected if successful. Newer versions of CutiePie will handle the connection automatically. The CutiePie GUI should now be aware of the created spectra. On the top menu, use the Geometry combo boxes to display one row and two columns of spectra. Select the first spectrum by clicking on the canvas inside the axes. The selected display will be highlighted in red.
- With the first spectrum canvas selected, choose the
raw.energy.00spectrum from the Spectrum combo box on the top menu and click Add. That canvas will now display the contents of theraw.energy.00spectrum. If you hover your mouse over the canvas, you will see the name of the displayed parameter on the canvas tab. Select the second tab and add thecal.00spectrum.
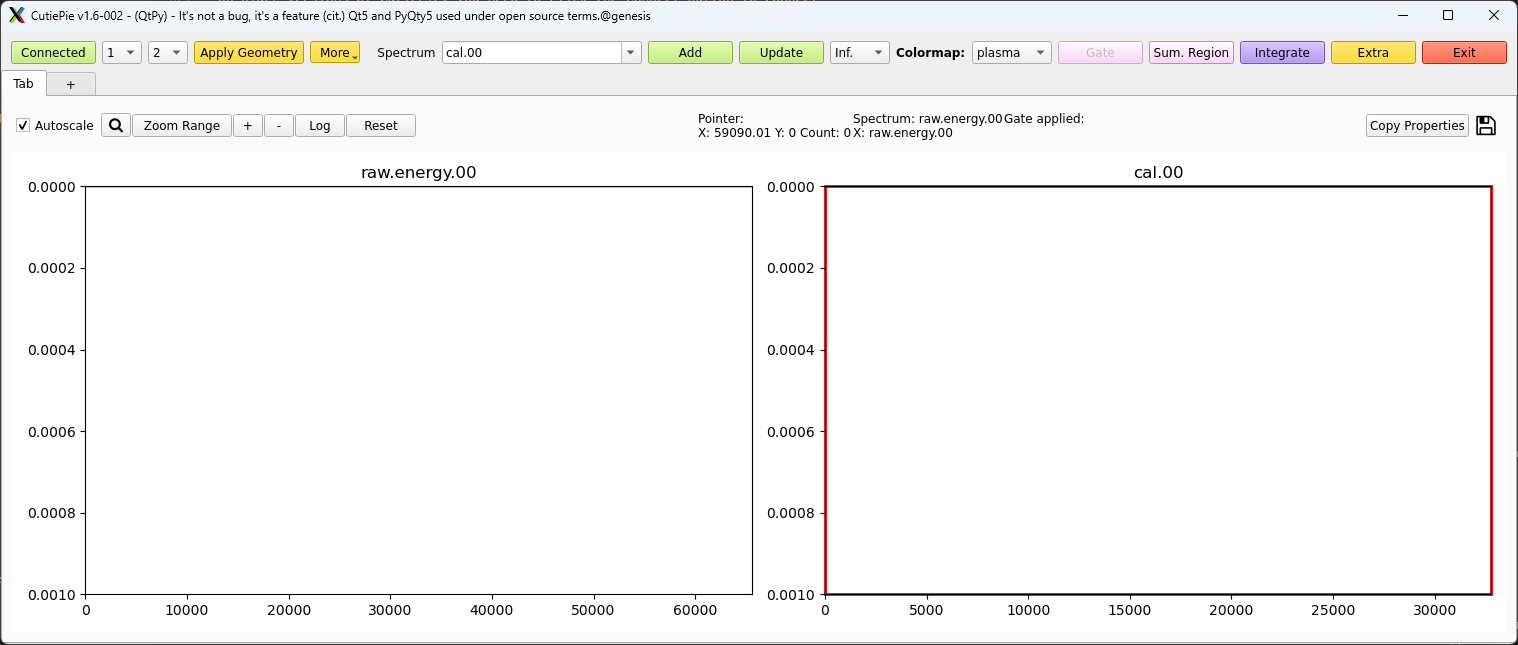
The CutiePie GUI displaying two empty spectra: raw.energy.00 on the left and cal.00 on the right
Attaching SpecTcl to a Data Source
- We can now attach SpecTcl to a data source. The data source can be either a file or an online ringbuffer. We will discuss how to attach to a ringbuffer to do real-time processing of DDAS data. Select
Data Source->Online...from the treegui top-level menu. In the resulting dialog:- Set the Host to the system where your ReadoutGUI is running and your event-built ring resides.
- Select the appropriate ring format. The format corresponds to the major version of the FRIBDAQ software being used to take data.
- Check that the ring name in the Ring field matches the event-builder ring name. If not, change it to the event-builder ring (the tutorial assumes event-built data).
- Click OK to attach SpecTcl to the online system. The SpecTcl control panel, shown below, can also be used to attach to a data source.
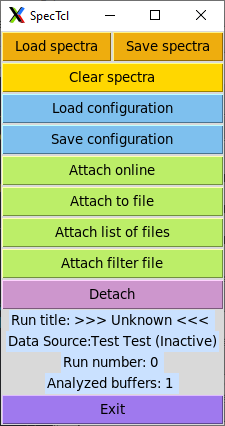
The SpecTcl control panel can be used to perform many common actions.
- You can also select an event file as a data source. To do so use the
Data Source->File...option from the treegui menu or the SpecTcl control panel and select a file using the file dialog. When you start a run on the ReadoutGUI and data starts making its way out of the event builder, you will see counts in the histograms that have valid inputs:
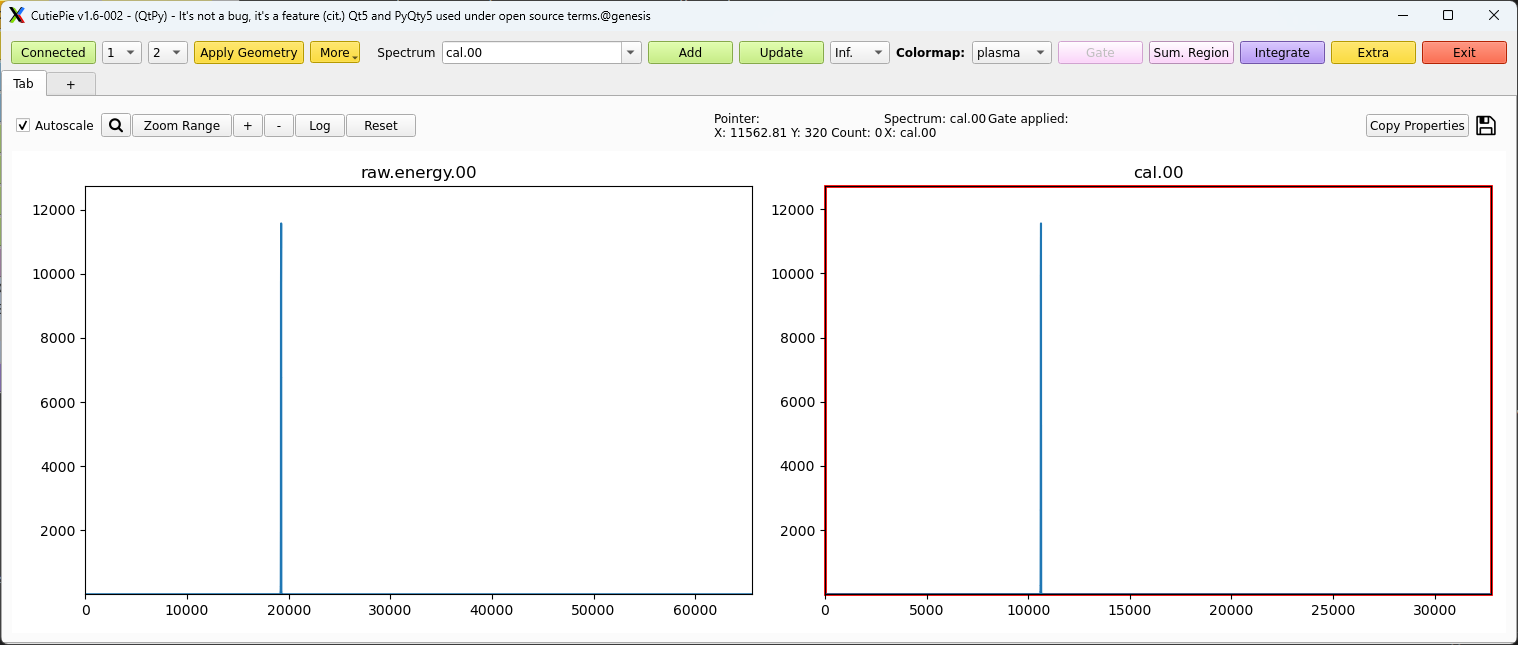
Spectra displayed on the CutiePie GUI
Creating ROOT Trees Using SpecTcl
- A powerful but little-used feature of SpecTcl is the automatic creation of ROOT trees from SpecTcl parameters. To use this feature the following lines must be added to your SpecTclRC.tcl file:
load $SpecTclHome/lib/libRootInterface.so
package require rootinterface
- Once SpecTcl is running, type
roottree create TREENAME *in the SpecTcl console to create a ROOT file containing a TTree with the specified TREENAME (I chose: mytree). The created tree has branches of all parameters.
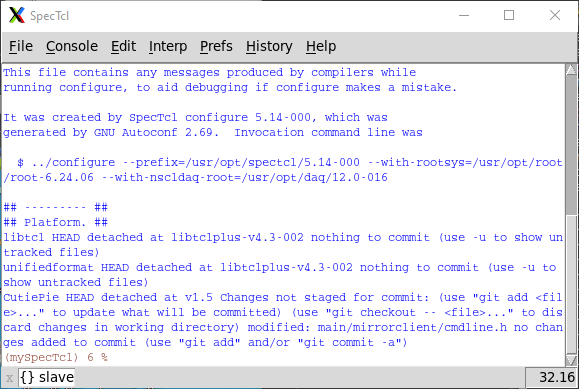
The SpecTcl console.
- The created ROOT file has the name run-X.root where X is the run number e.g.,
run-55.rootfor run 55. The run number is read directly from the data. Opening this ROOT file and looking at its contents shows that it contains mytree:
<genesis:mySpecTcl >root run-55.root
Attaching file run-55.root as _file0...
(TFile *) 0x56397f1e5040
root [2] _file0->ls()
TFile**         run-55.root
 TFile*         run-55.root
  KEY: TTree    mytree;1        mytree
root [3]
- We can look at the contents of mytree and see that it contains branches for all of our parameters:
root [3] mytree->Print()
******************************************************************************
*Tree    :mytree    : mytree                                                 *
*Entries :   182998 : Total =        71971741 bytes  File  Size =    6880280 *
*        :          : Tree compression factor =  10.48                       *
******************************************************************************
*Br    0 :SpecTcl_cal : 00/D:01/D:02/D:03/D:04/D:05/D:06/D:07/D:08/D:09/D:   *
*         | 10/D:11/D:12/D:13/D:14/D:15/D                                    *
*Entries :   182998 : Total  Size=   23498769 bytes  File Size  =    3276821 *
*Baskets :      735 : Basket Size=      32000 bytes  Compression=   7.17     *
*............................................................................*
*Br    1 :SpecTcl_raw : mult/D                                               *
*Entries :   182998 : Total  Size=    1468900 bytes  File Size  =      13595 *
*Baskets :       46 : Basket Size=      32000 bytes  Compression= 107.96     *
*............................................................................*
*Br    2 :SpecTcl_raw0 : energy/D:timestamp/D                                *
*Entries :   182998 : Total  Size=    2937685 bytes  File Size  =    1597208 *
*Baskets :       92 : Basket Size=      32000 bytes  Compression=   1.84     *
*............................................................................*
*... more baskets ...                                                        *
Conclusion
- This concludes the DDAS SpecTcl tutorial. You should understand some of the basic steps needed to tailor SpecTcl for your use including:
- How to use the DDAS unpackers and SpecTcl event processors,
- How to create spectra,
- How to attach to a data source,
- How to view spectra,
- How to convert your SpecTcl parameters into a ROOT TTree.